How to Clean & Lubricate an AR-15
Keeping an AR15 in working condition is not a hard thing to do. The AR15 is an incredibly durable and reliable piece of equipment, and can certainly take much more of a beating than you are giving it at your local range or hunting lodge. The following paragraphs will tell you how to keep your gun properly cleaned and lubricated, as well as show you a few things to keep an eye on during the cleaning process.
How Often Should I Clean My AR15?
Though I tend to clean my guns after each range day, it’s not because the gun needs it. Assuming you are a recreational shooter or weekend warrior, your AR isn’t going to need much more than regular lubrication to keep running like a...well, like a well oiled machine.
Really, the cleaning schedule is up to you. As long as the action is smooth and not grimy, the mag drops freely, and the gun feels healthy when firing, it is probably just fine. But let’s say you’re like me and you want to “deep-clean” your gun because you simply enjoy doing it.

A cleaning kit like the ones you can pick up at any sporting good store
Step 1: AR15 Cleaning Tools
No special tools are required for basic disassembly and cleaning. My cleaning area is usually as follows:
- An old rag to wipe off excess carbon and solvent
- A firm bristle toothbrush for scrubbing stubborn carbon
- A Barrel snake for your chambered caliber
- Q-tips to get into tight areas with solvent
- Your choice of reputable solvent and lubrication
Step 2: Unload and Prep the Area
First thing’s first, take your magazine out and cycle your action to make sure the gun is unloaded and safe. Since I am an inherently messy person, I like to put down newspaper or some kind of towel to work on. If you are working outside to avoid fumes, make sure the area won’t become contaminated with dirt or dust, which could blow into your rifle and negate all cleaning you just accomplished.
Step 3: Separate the Upper and Lower Receiver
Making sure that the chamber is empty, send the bolt home and release both takedown pins to separate the receivers. Now that your gun is separated into upper and AR 15 lower, go ahead and inspect both for anything more than carbon build-up. You are looking for things like primers or primer fragments, metal shavings, or non-typical debris. If any of the previous are found, you have issues beyond regular maintenance; requiring you will need to replace parts and have your gun inspected.
Step 4: Remove the Buffer, Buffer Spring, and Bolt Carrier Group
Assuming you just found a dirty gun and nothing else, go ahead and pull out your buffer, buffer spring, and BCG. The BCG will typically be the dirtiest item in the AR15, as the impingement system blows dirty gas directly back into it to cycle the rifle.

A heavily fouled BCG that needs a good cleaning
Step 5: Clean the Chamber and Barrel
I always get a lot of questions asking about cleaning your barrel. Unless you are shooting a precision rifle or very often, it really isn’t as necessary as people assume to clean a barrel often. There are actually people who claim that cleaning your barrel too often can affect the accuracy and zero. I would stick to once a month as far as running a snake through your barrel, but do check to make sure your muzzle device is tight and in line during routine cleanings.
Step 6: Clean the Disassembled Parts
I then do just a rag cleaning on these parts, as well as the upper and lower receiver before I spray them with anything. Once done with the rag, I spray a carbon solvent on and let it sit. There are plenty of great solvents out there, I was raised using Hoppes No. 9 and have never had any issues. Once the solvent has done its job, clean off the remaining carbon and look for your lubrication.
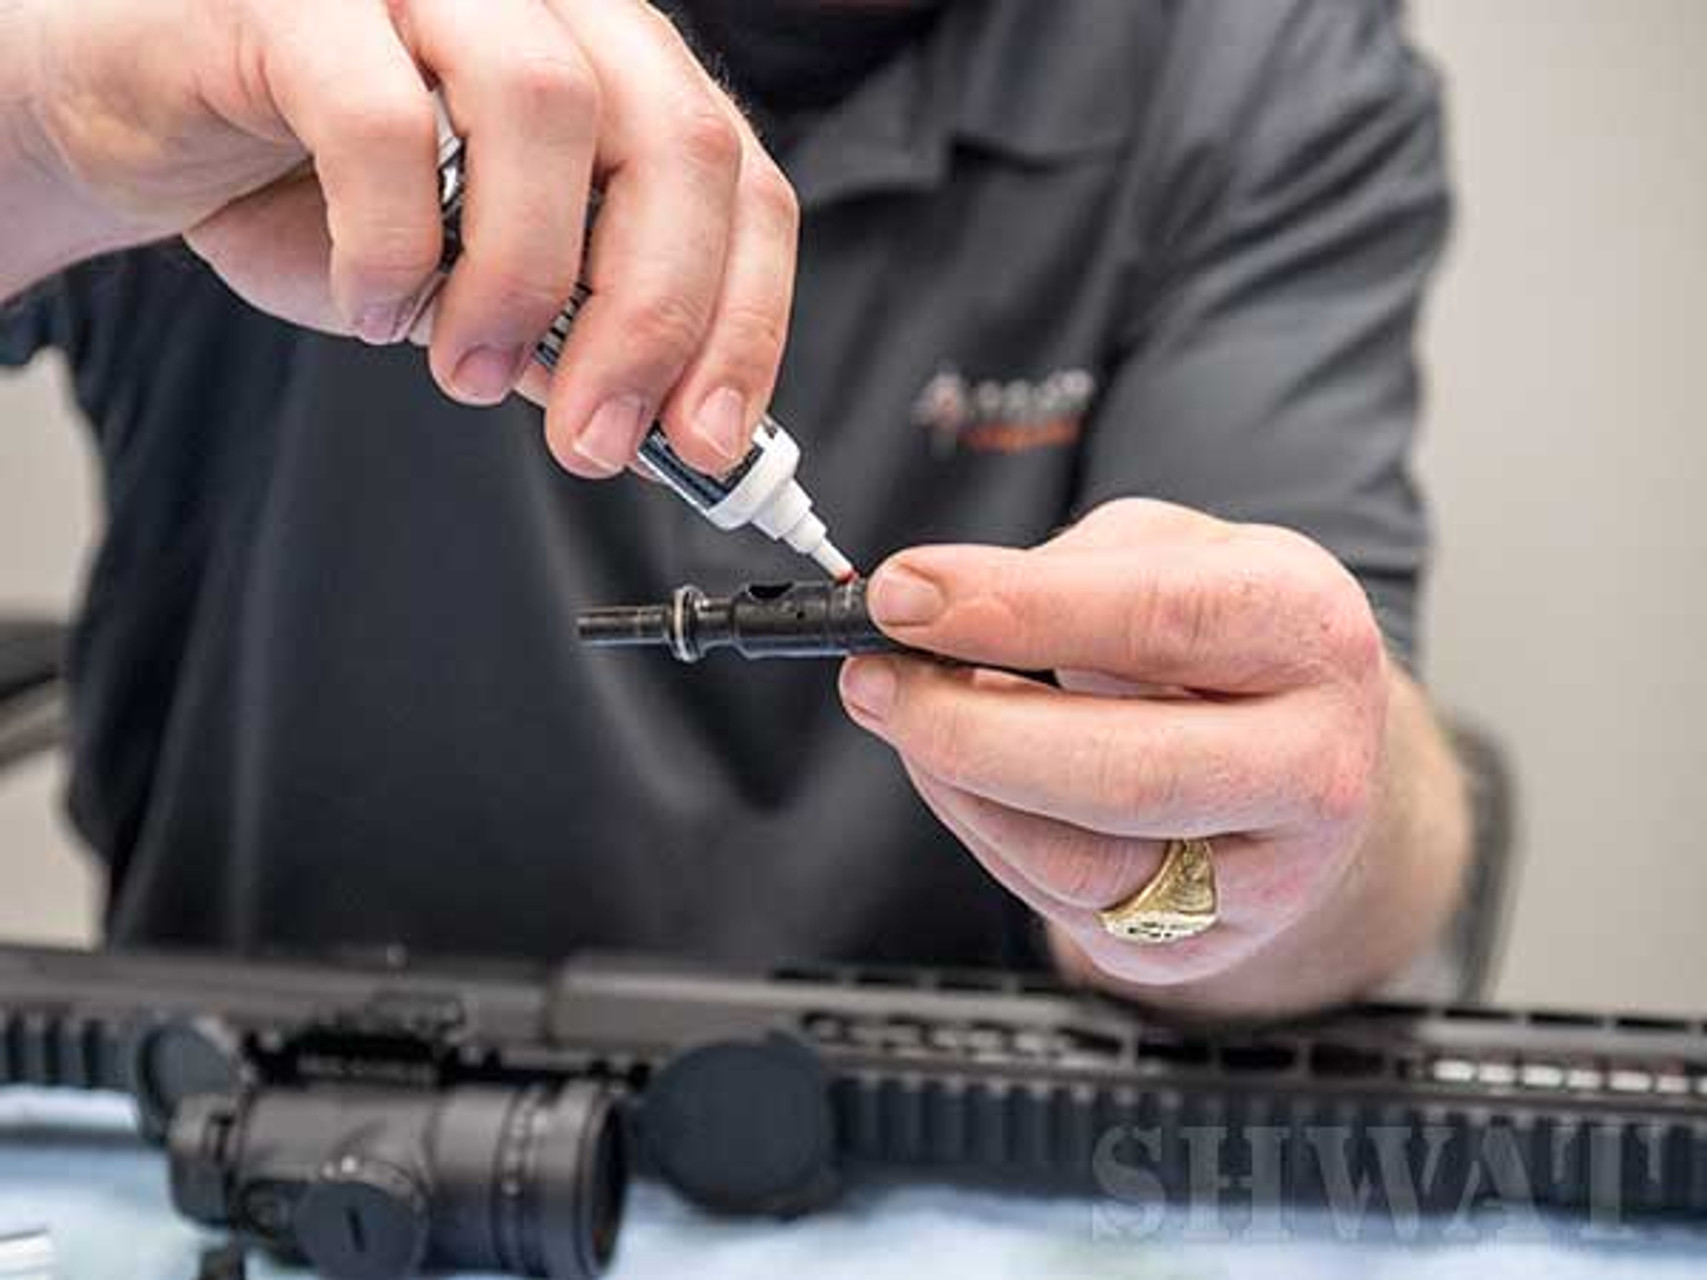
Step 7: AR15 Lube Points
Everyone likes to debate what lube is best, and really, it just comes down to what you like. I know guys who use expensive oils and pastes, as well as guys who just use motor oil. Lately, I have been a big supporter of FrogLube; which is a non-toxic paste, founded and operated by former Navy Seals, and it works flawlessly. The biggest thing, is that you keep the gun well lubricated, no matter what it is. An AR15 can go hundreds to thousands of rounds without a cleaning, provided that it is well-lubricated.
As far as what to lubricate and how much lubrication is needed, I was always taught like this: “if it moves, or has something move against it--oil it.”
These parts are illustrated in the chart below, and include the following:
- -Charging handle
- -Takedown (pivot) pins
- -Hammer face
- -Buffer spring and inside of tube
- -Chamber walls and Bolt-Carrier Group (heavy lube)
- -Bolt and Magazine catch
- -Inside of Dust Cover
- -Feed Ramp

A general guide to what needs light lubrication. A Bolt-Carrier Group (BCG) should be heavily lubricated.
As you can see, there are a lot of moving parts that will need attention. It’s important to remember that there’s no such thing as too much oil--any excess will be shot off. So apply a hefty amount of lubrication to your moving parts, while making sure everything is going back together smoothly. I always make sure to oil my trigger every time to keep it smooth and crisp, shoving a fair amount of oil down my buffer tube as well.
Now that you’ve cleaned and oiled your rifle, you are ready to join the upper and lower together again. Make sure your takedown pins slide and lock in position without too much force, and cycle the action a few times to make sure everything is together properly before feeding the rifle live ammo.
And voila! You have now successfully cleaned and inspected your AR15, and are for another range day or hunting trip. Always make sure even if not cleaning, to at least inspect your rifle from time to time in order to make sure everything is operating as designed. The AR is incredibly reliable, but parts do wear out eventually, and the last thing you want is to have your gun fail during a fun range day or hunting trip, causing you embarrassment or potential injury.
Our Recommendation

While Hoppes' products are great for cleaning they're not necessarily the best long term option for lasting lube in your guns. When it comes to rifle lube, you need a substance that's a bit heavier duty and that means a thicker liquid. Hoppes' is quite thin which is why our favorite go to brand is Lucas Oil. With regard to handguns, especially since we carry the GST-9 MOD1, a DIY 80% Glock-style pistol frame, which requires a break-in period before its performance is consistent — having a thicker oil drastically helps this process.
You can opt for either their Red N Tacky which is very thick and will last you a long time (works great for buffer springs) - they can be found at just about any hardware or automotive supply store. Lucas Oil also has an 'Extreme Duty' line of oil products that were designed specifically for firearm usage. The Lucas Oil Extreme Duty Gun Oil is exceptionally great for bolt carrier groups and even with a small bottle, you'll find that you won't run out of it too quickly either.